Ever wish you could have a photo editor in house? Someone who could whip up a meme, tweak a photo or put together a fancy graphic for your Facebook page? That someone could easily be you!
Like most nonprofits, we don’t have a graphic designer on staff. We did some research to find a tool that would help us best approximate one, and found that PicMonkey is a great and easy-to-use photo editing tool. It allows you to do most of the photo trickery of Photoshop, with a lot less fuss! And best of all, it’s cheap! All of the basic features are free.
There are a number of tutorials on the PicMonkey site that can walk you through effects and features. There is so much you can do beyond the basics we cover here, so be sure to experiment!
Text Overlay
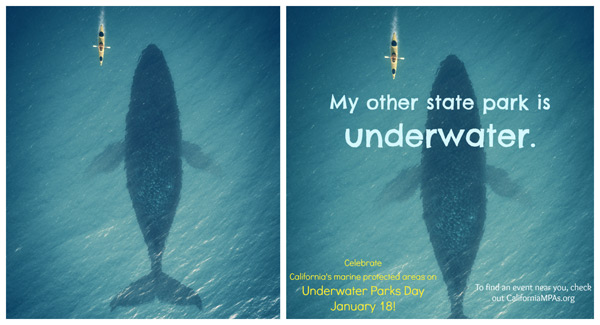 Want to create your own meme? Text overlays are the way to make it happen. Remember to keep it brief–your text shouldn’t cover more than a third of your image. Also, don’t forget to put your website URL on there. That way, if it does get shared far and wide from your website or Facebook page, people will be able to find their way back to you.
How to:
 1. Upload your image. High resolution photos will make the best background for your text. Make sure you use an image that is Creative Commons licensed, or that you have permission to use! Search for images that are free to use and share using Google Image Search Advanced Settings: Usage Rights.
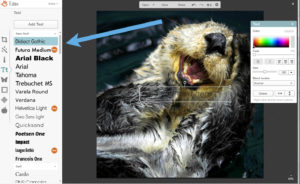 2. Select the text tab on the left (“Tt”) and then click “Add Text” to add text to your image. If you see any fonts that you like that have a crown icon next to them, they are only available as a premium user. You’ll note, however, that the majority of the fonts are free.
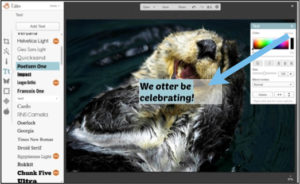 3. Type in your text. You can highlight the text with your cursor to play around with fonts as well as size and color. A menu will pop up to show you all of the ways you can alter your text.
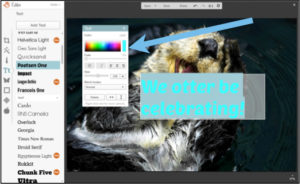 4. Choose your color. The rainbow of colors you see at the left are all of your color options. Once your text is highlighted, move your cursor within the rainbow to pick a color that best suits your image.
 5. Position the text. Lastly, you just need to select and drag the text box to it’s resting spot. Save it and you’re done!
You’ve just completed Memes 101!
Merging Images
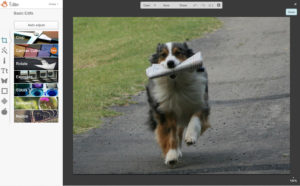
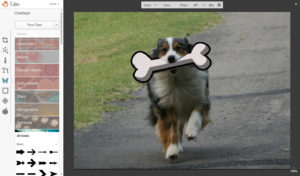
 PicMonkey has a number of photoaltering features that we love (like the ability to airbrush out wrinkles and blemishes from your photos) that we won’t cover here. One of the features we use the most is the “Overlay” feature. Here, you can import an image over another image and blend them together. It’s how we got this otter to hold a birthday cupcake. The sky is the limit here, too.
How to:
 1. Upload your base image. This will be the main background on which you’ll upload the other image you want to merge.
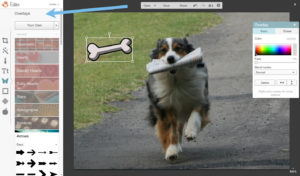 2. Click on the Overlay tab (the butterfly icon on the left). You’ll see there are a number of overlays that come with the PicMonkey site. To merge images, we’ll use the “Your Own” button to upload our own image.
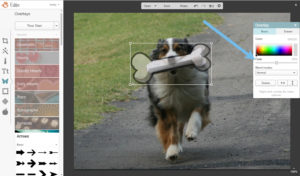 3. Merge the overlay image. When you click on your own overlay image, you’ll see a menu pop up. One of the options is “Fade,” which will allow you to fade the image so that you can see through it and place it where it needs to go. You can use the arrows in the menu box to flip the image horizontally or vertically, if needed.
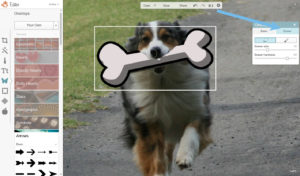 4. Click the “Eraser” tab when you’re in the “Fade” mode to erase part of the image so it looks like it fits naturally. You can adjust the size and “hardness” of the eraser, too. This will determine soft-edges, which are a little more forgiving, or hard edges on your overlay image. You can also zoom in to get more detailed in your erasing.
Took too much off? No problem! Click the paintbrush to draw back in some of your original overlay.
 5. “Unfade” the overlay image, save it and you’re done! Voila! Who needs Photoshop?
Download your own copy of this tutorial here.